How to create your own assignment
How to create your own assignment
We've revamped the way educators can create assignments for your learners to make it much more user-friendly. For a more detailed guide please click here for a video on how to create your own assignments on the Neo Series Campus.
Assignments are used to:
- Prescribe specific video lessons or Test your understanding quizzes (TYU's) to one learner, a group of learners, class or a particular grade.
- This can be useful to provide additional learning opportunities for learners struggling with a topic.
- Provide an opportunity for learners to revise a topic/s prior to a test or exam.
- Test the understanding of the learners on a particular topic before moving onto the next chapter.
1. Creating an assignment
Setting up
- To begin creating an assignment, navigate to the Educator Dashboard using the button at the bottom-right of the screen.
- From here, click on the 'Assignments' button.
- Once in the Assignments section, click on the 'New assignment' button at the top-right of the screen.
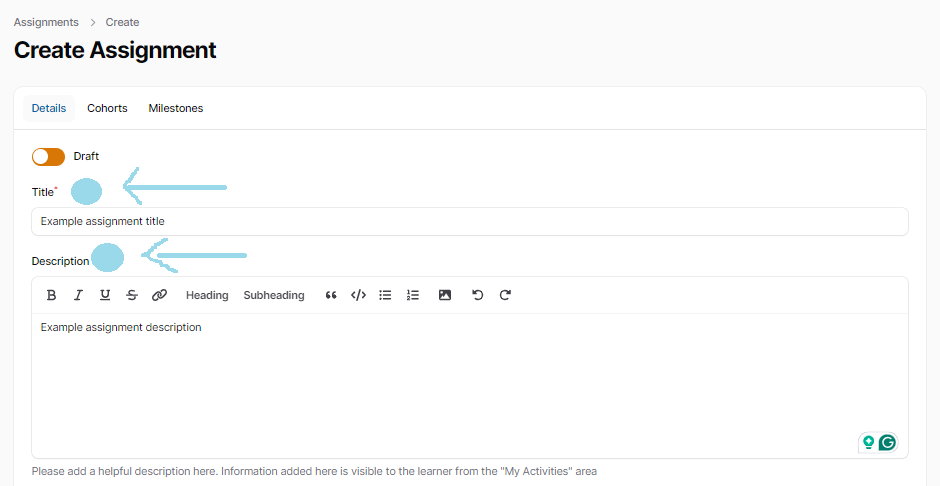
- From here, you will need to provide the following information
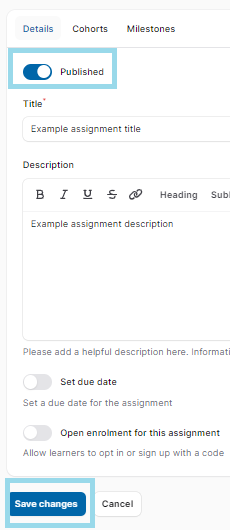
- Title of the assignment: Feel free to insert any meaningful title that learners will be able to easily recognise.
- Description of the assignment: It is a good idea to provide a short and sweet description of the assignment at hand, specific to the purpose of it.
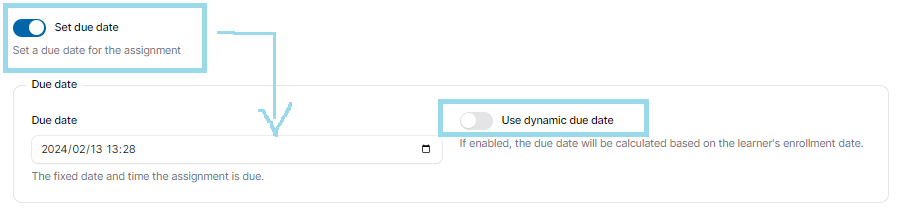
- Due date of the assignment (Easiest option):
Here by toggling on, you can set a static due date (learners need to complete the assignment on a defined date and time), or a dynamic due date (once learners are enrolled to the assignment, they will have a predetermined amount of time to complete the assignment).
You can also leave it un-toggled if you would like the assignment not to have a due date.
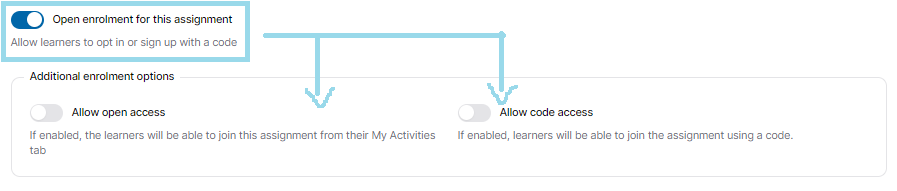
- Auto-enrolment options:
- You can select whether to allow open enrolment, which means any learner can enrol themselves to the assignment. Or, you can select enrolment to be based on a code, which the learners will need provided to them to enable them to enrol themselves into an assignment.
- You can also manually enrol learner(s), which we will look at further below.
IMPORTANT : When you are ready, click on the 'Create' button to proceed to the next step - linking learning materials.

2. Adding video lessons and TYU's
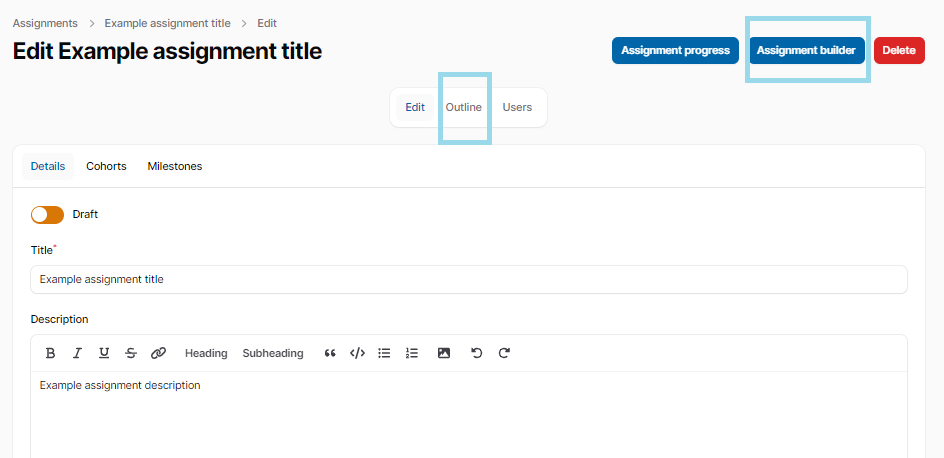
Now that you have completed the initial setup of your assignment, it's time to start adding educational resources. To do so, navigate to the Assignment Builder section at the top of your screen.
Here you will have the option to:
- Add video lessons, which are resources from the Advantage Learn Libraries.
- You will need to first select the path of your choice (most typical approach) then select the unit from that path you want e.g. Grade 8 Core (Path) and Functions Coordinate System (Unit)
- Click Apply filter.
- It will then show the video lessons that are available for that unit.
- You can then add all the video by selecting all or select one or two of them and then click Add
- You can follow the steps above multiple times to add videos and when you are happy click Next
- Add TYUs, which are resources from the Advantage Learn Libraries
- Follow the same steps as above but select the TYUs that you want
- Click Next when you have added all the TYUs you want.
- Order, this is where you are able to choose the order of you would like the learners to follow in the assignment. Click on this sign (insert image) and then drag the resources into the right order.
3. Adding learners
This section is useful when assignments do not make use of open enrolment, or code enrolment, as discussed earlier on. It can also be useful if you would like to directly add one or more learners to the assignment or a specific class, manually.
- To add learners to your assignment, navigate to the Users section by heading to step 4 in the assignment builder. The Add users section at the top of the assignment edit page.
- Here, you will be able to add multiple users, individually, or even pre-established classes of learners. To do so, click on the search fields below either the Add user or Add class options or Add Grade, and search for the specific party.
- Once you are satisfied that the desired parties are added to the assignment, feel free to continue to the next section - setting up alerts.
4. Setting up alerts (this can be left out)
Alerts are useful to provide learners with alerts, either when they have been enrolled to the specific assignment, or when they have successfully completed it.
- To add an assignment alert, click on the Add Alerts section at the top of the assignment edit page.
- From here, you can select whether one, the other, or both alerts need to be enabled, using the buttons below them.'
- To customise an alert, simply click on the alert you would like to add. This will open a new window where you can set the subject of the alert, as well as add a message in the content section.
- When you are happy with the alert, feel free to click on the Create button. You will be taken back to the assignment builder page.
When you are ready to publish the assignment, click on Publish but check out these helpful checks to do before:
- Your assignment has a descriptive title and the description is clear to the learner on what is expected of them.
- You've set a due date, either fixed or dynamic, or have intentionally left the due date open.
- You've set up auto-enrolment options as needed, and if applicable.
- You've added in all lessons, units and assessments that you would like learners to complete as part of this assignment.
- You've added any users and/or groups of learners, if applicable.
- You've set up assignment alerts as needed, and if applicable. Its a good idea to disable these if they're not intended to be used.
5. Publish assignment
- Your assignment has a descriptive title and the description is clear to the learner on what is expected of them.
- You've set a due date, either fixed or dynamic, or have intentionally left the due date open.
- You've set up auto-enrolment options as needed, and if applicable.
- You've added in all lessons, units and assessments that you would like learners to complete as part of this assignment.
- You've added any users and/or groups of learners, if applicable.
- You've set up assignment alerts as needed, and if applicable. Its a good idea to disable these if they're not intended to be used.
You've set up your assignment, checked it and you're ready to go live! To set your assignment in motion, you will need to change the Assignment status from Draft to Published and click on the Save Changes button.
This assignment will now appear in your learners My Activities section!
You are welcome to reach out to us via the chat box located at the bottom right of your screen or to send us an email at info@advantagelearn.com if you have any queries or require any assistance.
Related Articles
How to view your learners assignment progress
How to view your learners assignment progress Admin Area To view the progress that your learner have made on an assignment, please follow these steps to access the Assignments Progress Feature: Once logged you are logged into your campus, click on ...Where can I find the due date of my assignment?
Where can I find the expiry date of my assignment? After navigating to the 'My Activities' tab from your campus dashboard, you will see all the assignments that you still have outstanding listed under the 'All Activities' page: The due date of your ...Why can't I access my assignments?
Why can't I access my assignments? To access your assignment, follow these steps: Click on the following link and then select your campus to log in. Once logged into your campus, go to the 'My Activities' tab on the left-hand side of your screen. ...How to upload an assessment
How to upload an assessment Practice assignment for uploading a PDF document to the Campus We understand the importance of being well-prepared for your Further Studies assessments. To ensure you are fully equipped to navigate the new upload feature ...How to reset your password
How to reset your password If you are having trouble remembering your password it can be reset in a few simple steps. Step 1 When you are at the login page enter your email address. Step 2 Once you have entered your email address, just below where ...